Automatic tensioner - is a belt tensioner device for automotive transmission systems. The tensioner is mainly composed of a fixed casing, a tensioner arm, a spring case, a torsion spring, a rolling bearing, a spring, a bushing, etc., and can automatically adjust the tensioning force according to the different degrees of tightness of the belt, so that the transmission system is stable, safe and reliable. The tensioner is a consumable part of the automobile spare parts. The belt is easy to be stretched for a long time. The Automatic tensioner can automatically adjust the tension of the belt, and make the belt running more smoothly, less noise, and can prevent slipping.
Automatic tensioner basic structure and working principle
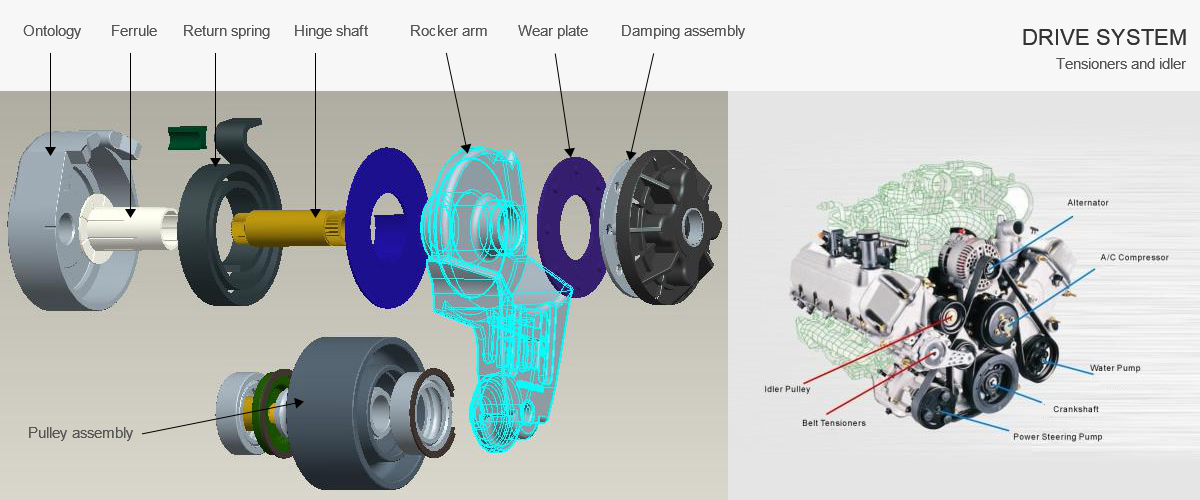
The structural principle of the Automatic tensioner
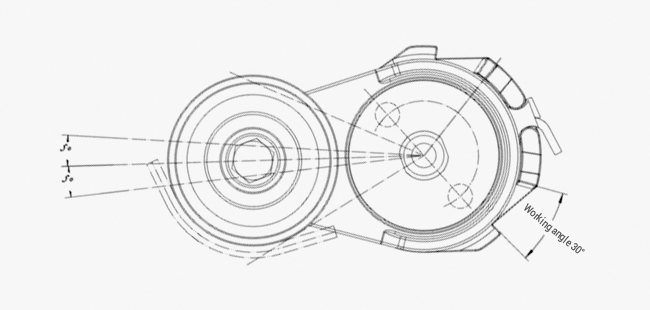
Automatic tensioner is composed of a pulley, a tensioner arm, a base, a return spring, a hinge shaft and so on. The pulley is fixed to the other end of the tensioner arm through a bearing and a shaft bolt, and the pulley rotates freely around the axis. The tensioner arm, the return spring and the base are hinged by a hinge shaft. The tensioner arm and the base are relatively rotatable, and plastic parts such as wear-resistant damping are designed between the moving parts.

Working principle of tensioner:
The tensioner releases the pre-tightened flat scroll spring or the cylindrical torsion spring during work to achieve the purpose of automatically tensioning the accessory belt
Automatic tensioner installation specification
1. Scope
This specification is applicable to the operation of the Automatic tensioner assembly during installation.
2. The installation steps of the anisotropic tensioner:
①Mount the tensioner with the M10 countersunk bolt;
②It is recommended that the tightening torque of the bolt be: (50 ± 5) N m;
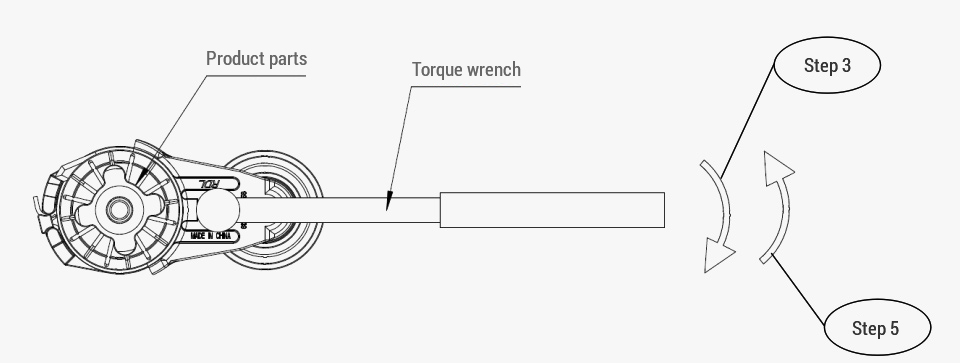
③Use a wrench to pull the tensioner arm to the maximum corner;
④Route the belt around the pulley in a proper order and keep it in the correct position;
⑤Slowly loosen the tensioner arm to compress the belt.
⑥Pull out the wrench and OK.
As shown below:

3. Installation steps of the same direction tensioner:
①Install and fix the tensioner with M10 flange bolts;
②It is recommended that the tightening torque of the bolt be: 50±5N m;
③Use a square hole wrench to pull the tensioner arm to the maximum corner;
④Route the belt around the pulley in a proper order and keep it in the correct position;
⑤Slowly loosen the tensioner arm to compress the belt.
⑥Pull out the wrench and OK.
As shown below:

4. Precautions when installing the tensioner:
①The wedge of the belt must be in the corresponding groove of the pulley;
②check that the arm of the tensioner is close to the free position when the arm of the tensioner is in the tight belt, if near the small angle of the free position, Replace the belt.
③When disassembling the tensioner, follow steps ⑥→②.
Note: For products with latches, first remove the pin in the correct direction when installing.
Contact Us
